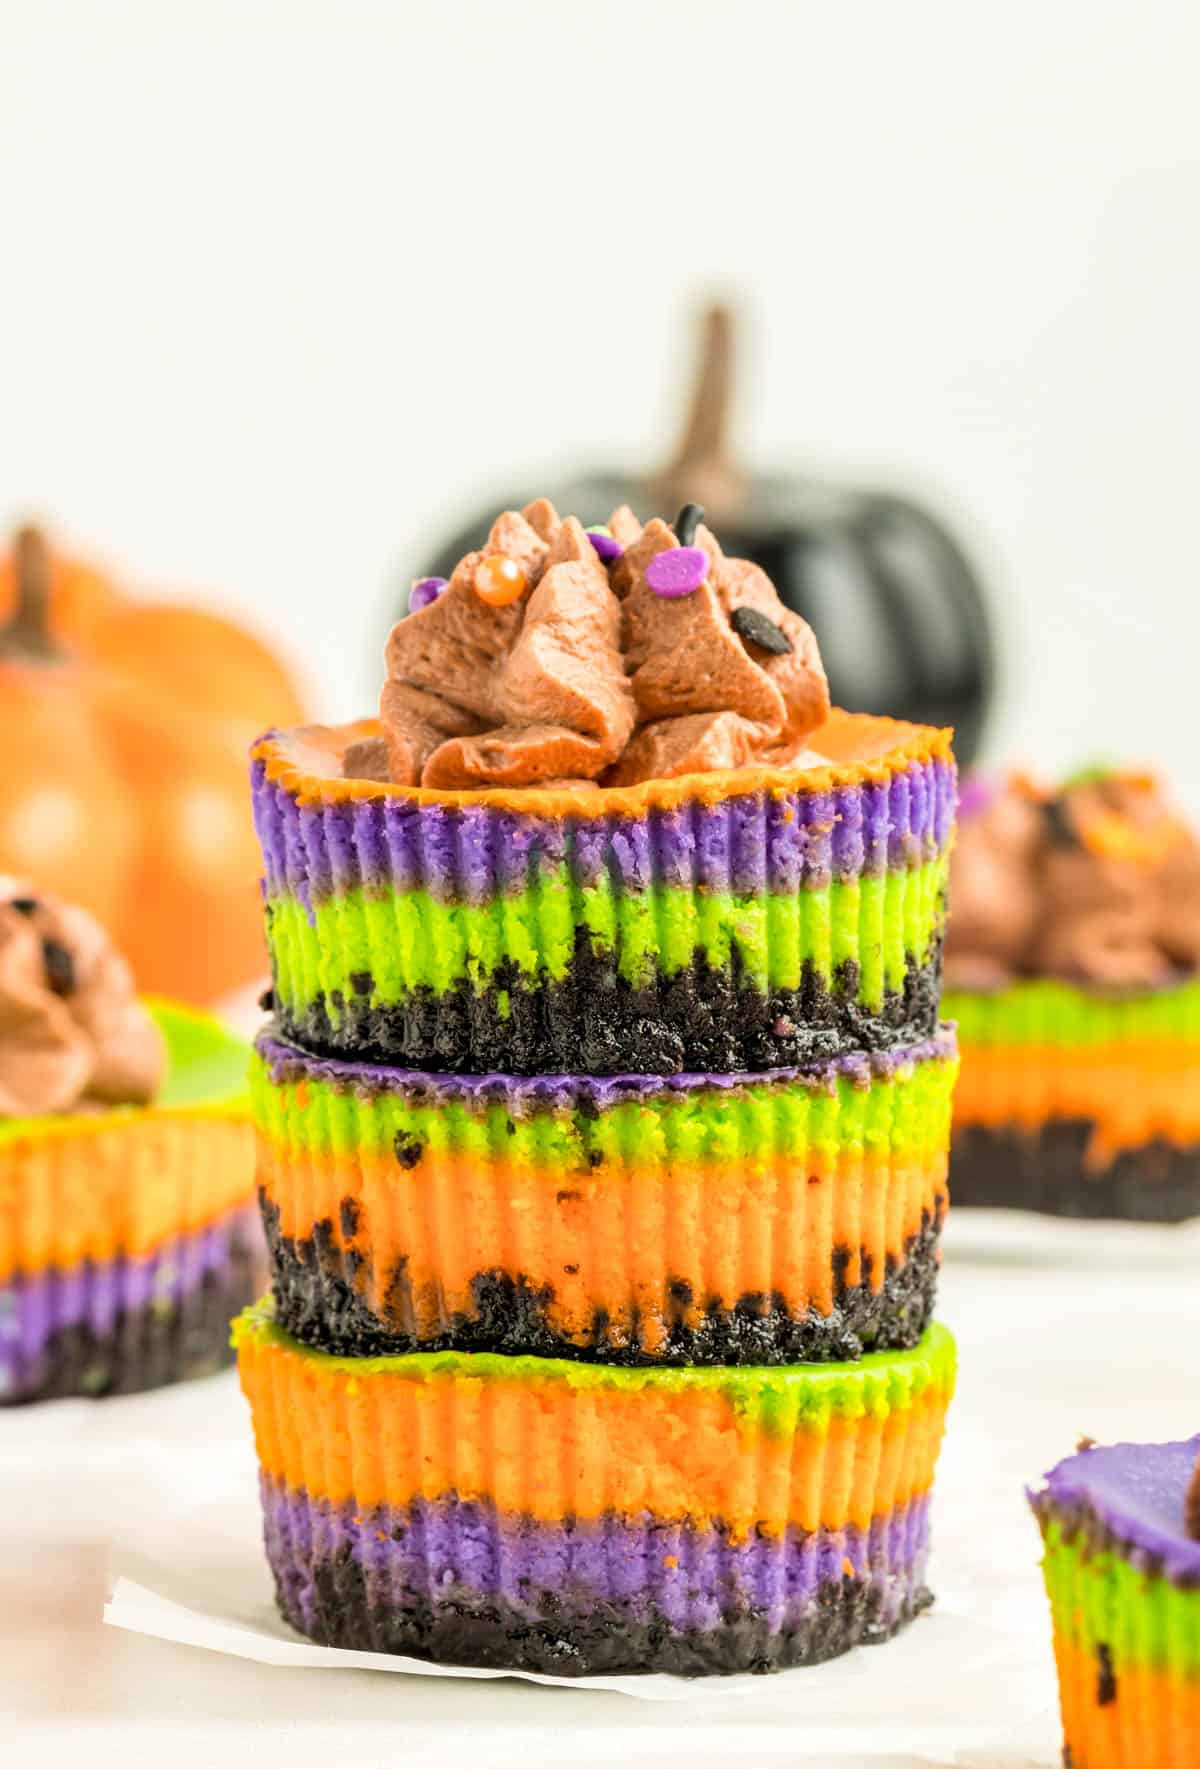
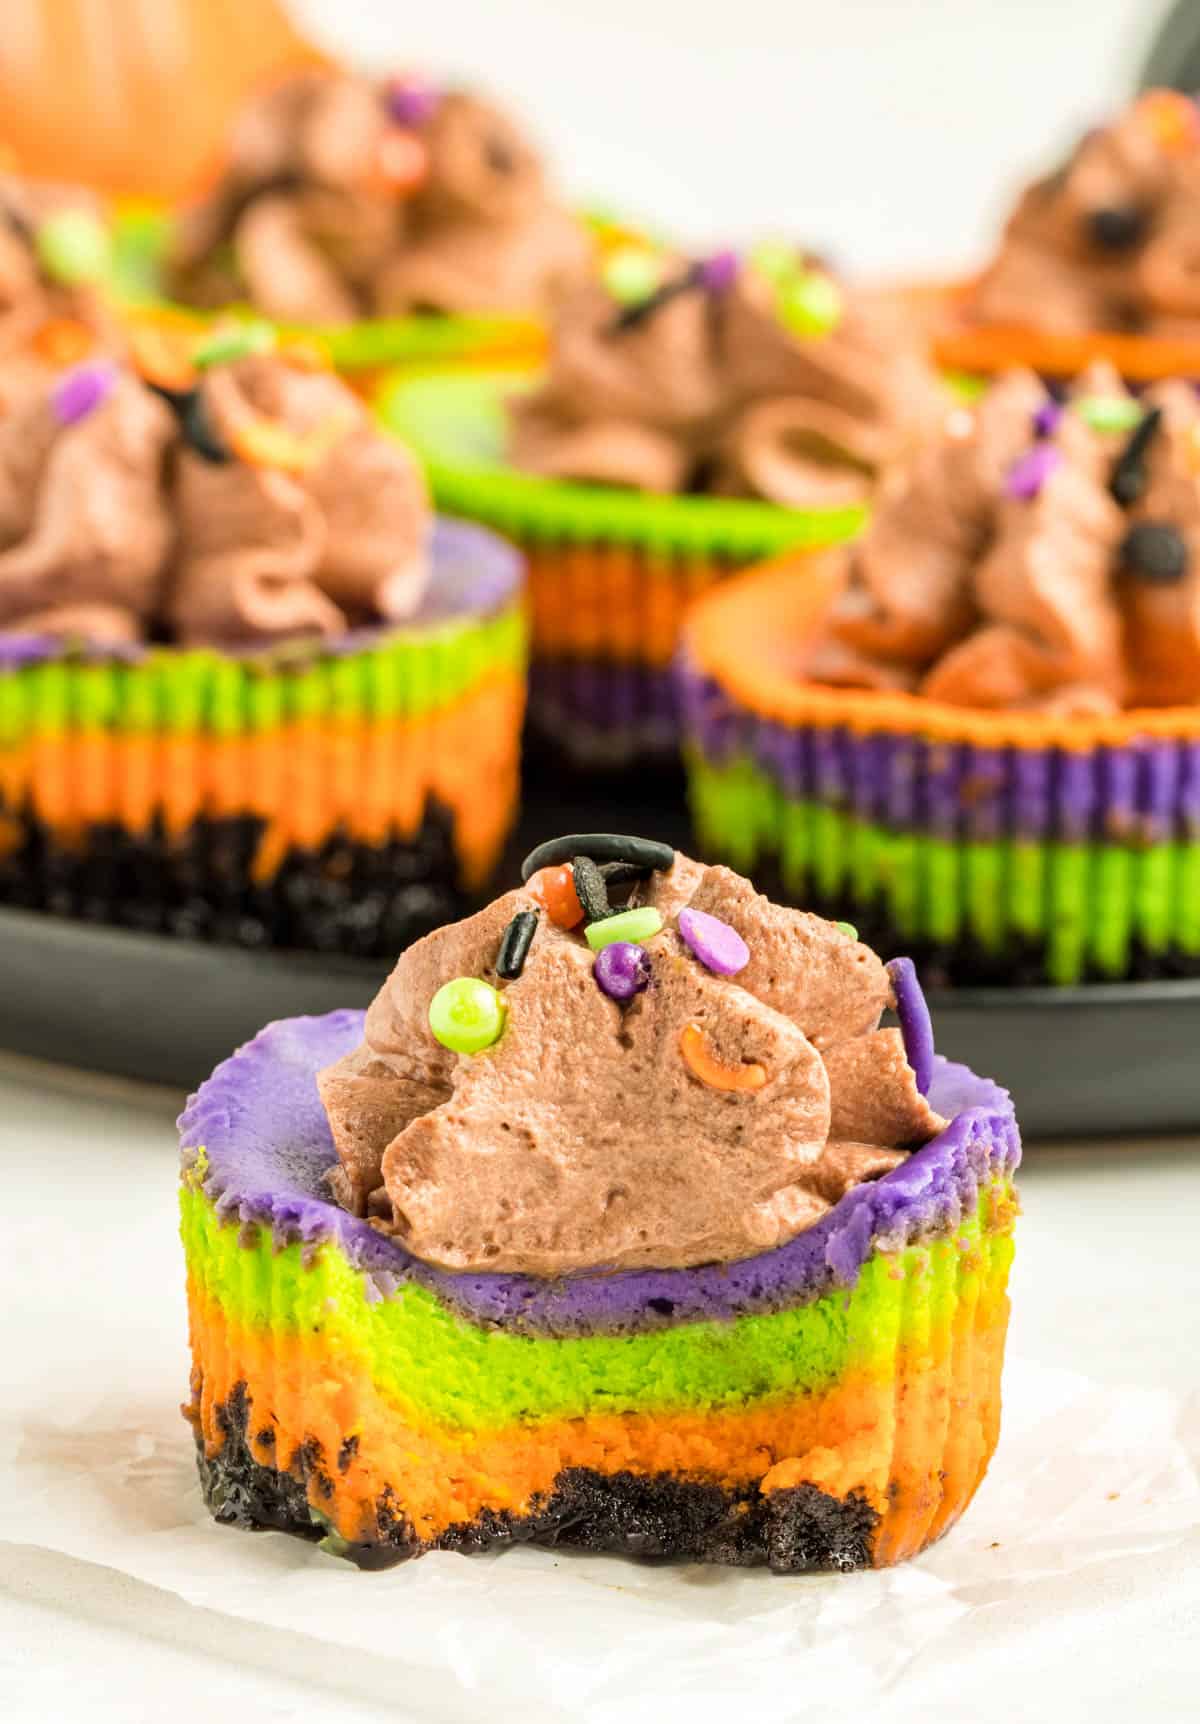
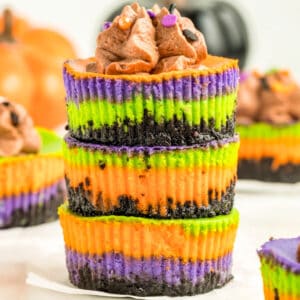
These vibrant Mini Halloween Cheesecakes are rich with cheesecake flavor and a tasty Oreo cookie crumble crust. A colorful treat for all your Halloween parties.

You guys, these Mini Halloween Cheesecakes are perfection in just a few bites! Not only are the super bright, vibrant, and insanely colorful, but they’re insanely delicious.
My family and I are HUGE cheesecake fans. What better way to celebrate Halloween, or any other holiday, than with a perfect Cheesecake dessert recipe?
These Mini Halloween Cheesecake are perfect for any upcoming Halloween parties, and they’re totally giving off Hocus Pocus vibes, so if you’re excited about the new film, then whip up a batch of these to snack on while you’re watching it.
They are super easy with on hand ingredients which we love, and they layering to make the fun colors doesn’t take much effort either. Plus you can change the colors for any occasion.
Another great thing is that these are a smaller portion so you can choose how many you want to eat. You don’t have to commit to a large slice of cheesecake, one of these will do the trick for you.
If you are looking for a fun, flavorful and easy Halloween recipe that everyone will love, then you need to make a batch of my Mini Halloween Cheesecakes.
Some of our other favorite Halloween recipes we have on our site include: Peanut Butter Halloween Brownies, Halloween Cookie Bars, and Halloween Dirt Cake.
WHY THIS RECIPE WORKS:
- Readily available ingredients help these come together in no time.
- Fun and vibrantly colored.
- Incredibly delicious and adorable – perfect for Halloween parties.
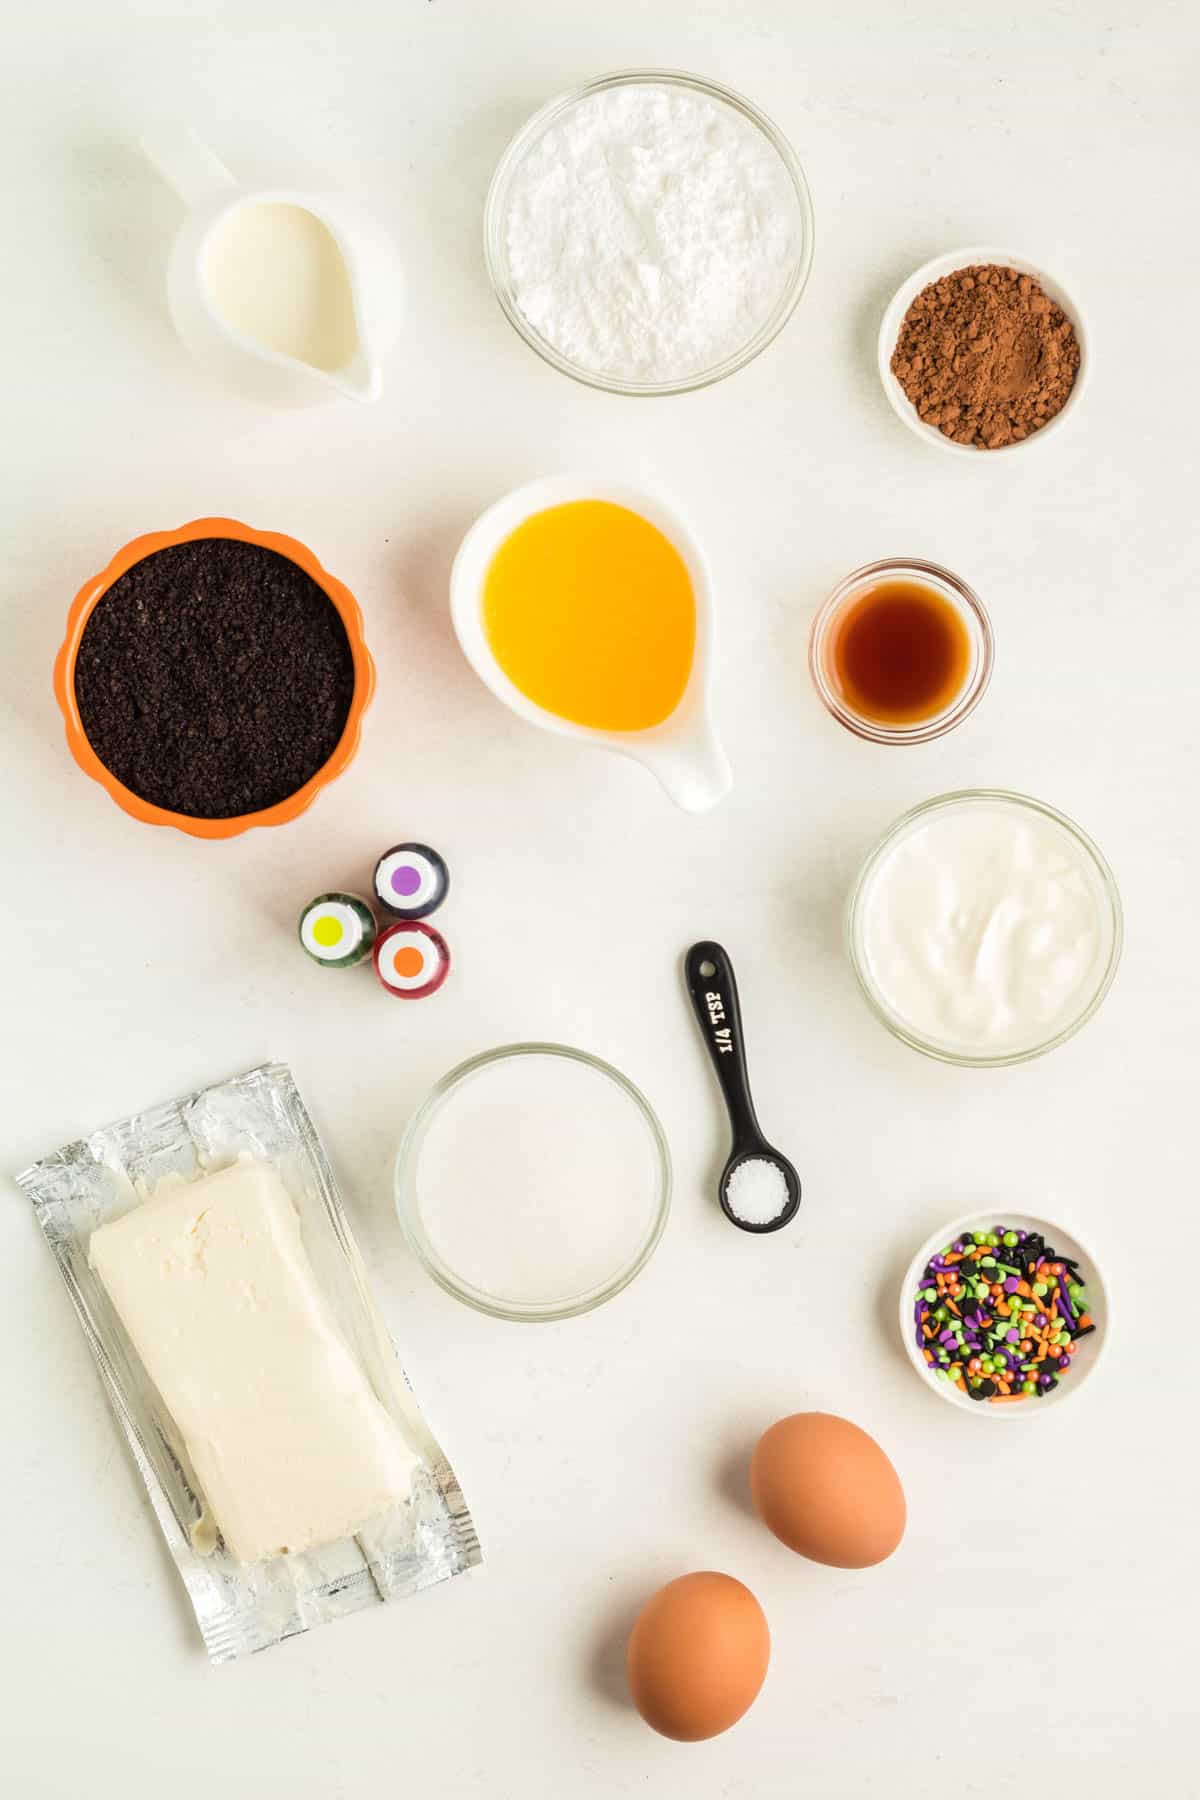
INGREDIENTS NEEDED (FULL RECIPE AT BOTTOM):
Oreos
Unsalted butter
Kosher salt
Cream cheese
Sour cream
Granulated sugar
Vanilla extract
Eggs
Purple gel food color
Orange gel food color
Green gel food color
Chocolate Whipped Cream:
Heavy whipping cream
Powdered sugar
Cocoa powder
Sprinkles to decorate
HOW TO MAKE MINI HALLOWEEN CHEESECAKES, STEP BY STEP:
- Preheat the oven to 325 degrees F. Line a 12 well muffin pan with paper liners and set aside.
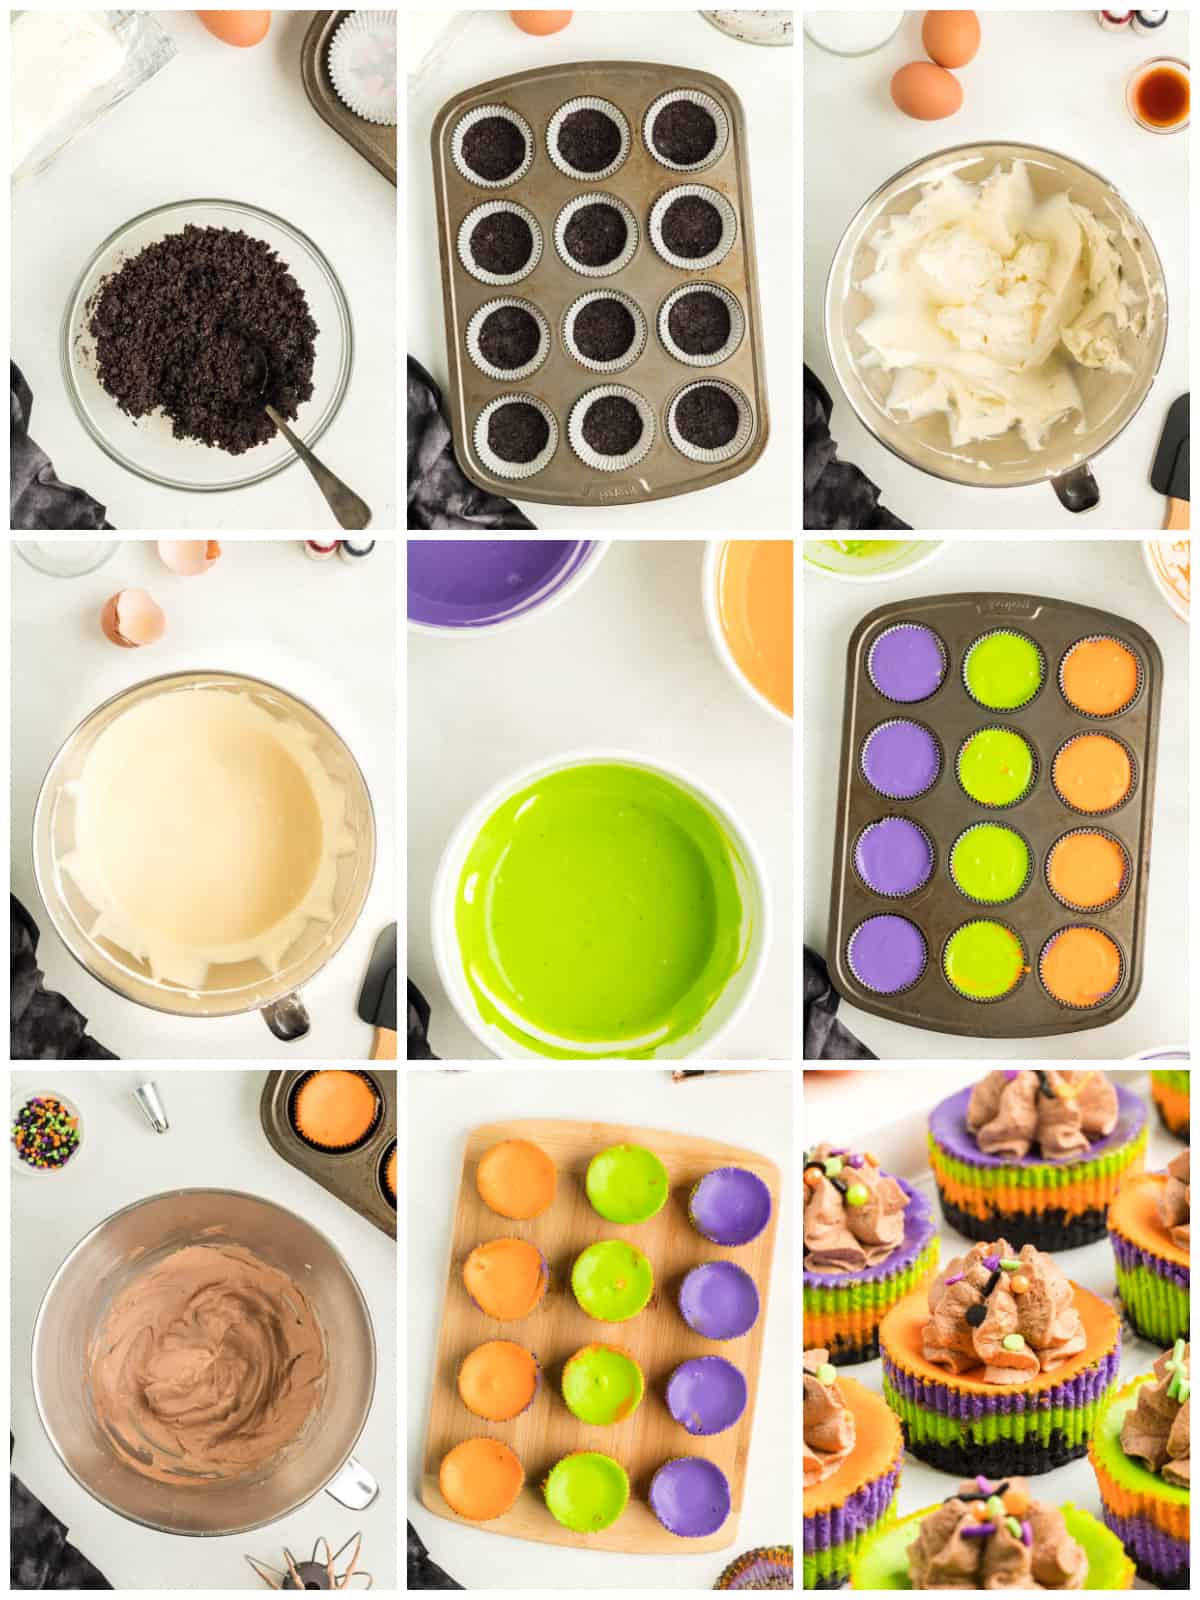
- Mix crushed Oreos, melted butter and salt in a bowl until well combined.
- Evenly distribute the mixture in the lined muffin pans. Press the crumb mixture down to create the crust for the cheesecakes.
- Bake the crusts for 5 minutes. Set aside to cool while you prepare the filling.
- To make the filling, mix the cream cheese and sour cream with a stand or hand mixer on low speed until smooth and well combined.
- Add the sugar, vanilla and salt and beat on low speed until well combined. Add eggs one at a time and beat on low until just combined.
- Divide the batter evenly into three separate bowls. Add the purple food color to one of the bowls and mix until just combined. Repeat with the orange and green food color in the remaining two bowls.
- Layer the colored batter onto the cooled crusts in one tablespoon increments. For example, one tablespoon of purple batter, topped with one tablespoon of orange batter, then one tablespoon of green batter. The order of the batter doesn’t matter here, you can get creative. Do this carefully so they do not mix, but if they do that is ok.
- Bake the cheesecakes for 15-20 minutes or until the top of the cheesecakes are set. Allow the cheesecakes to cool in the pan for one hour at room temperature. After an hour remove the cheesecakes from the pan and transfer to the refrigerator for at least 3 hours, or overnight.
- Once the cheesecakes have set, remove them from the paper wrappers and set aside while you prepare the chocolate whipped cream.
- Combine heavy cream, powdered sugar, cocoa powder and salt in a large bowl and whip until stiff peaks form.
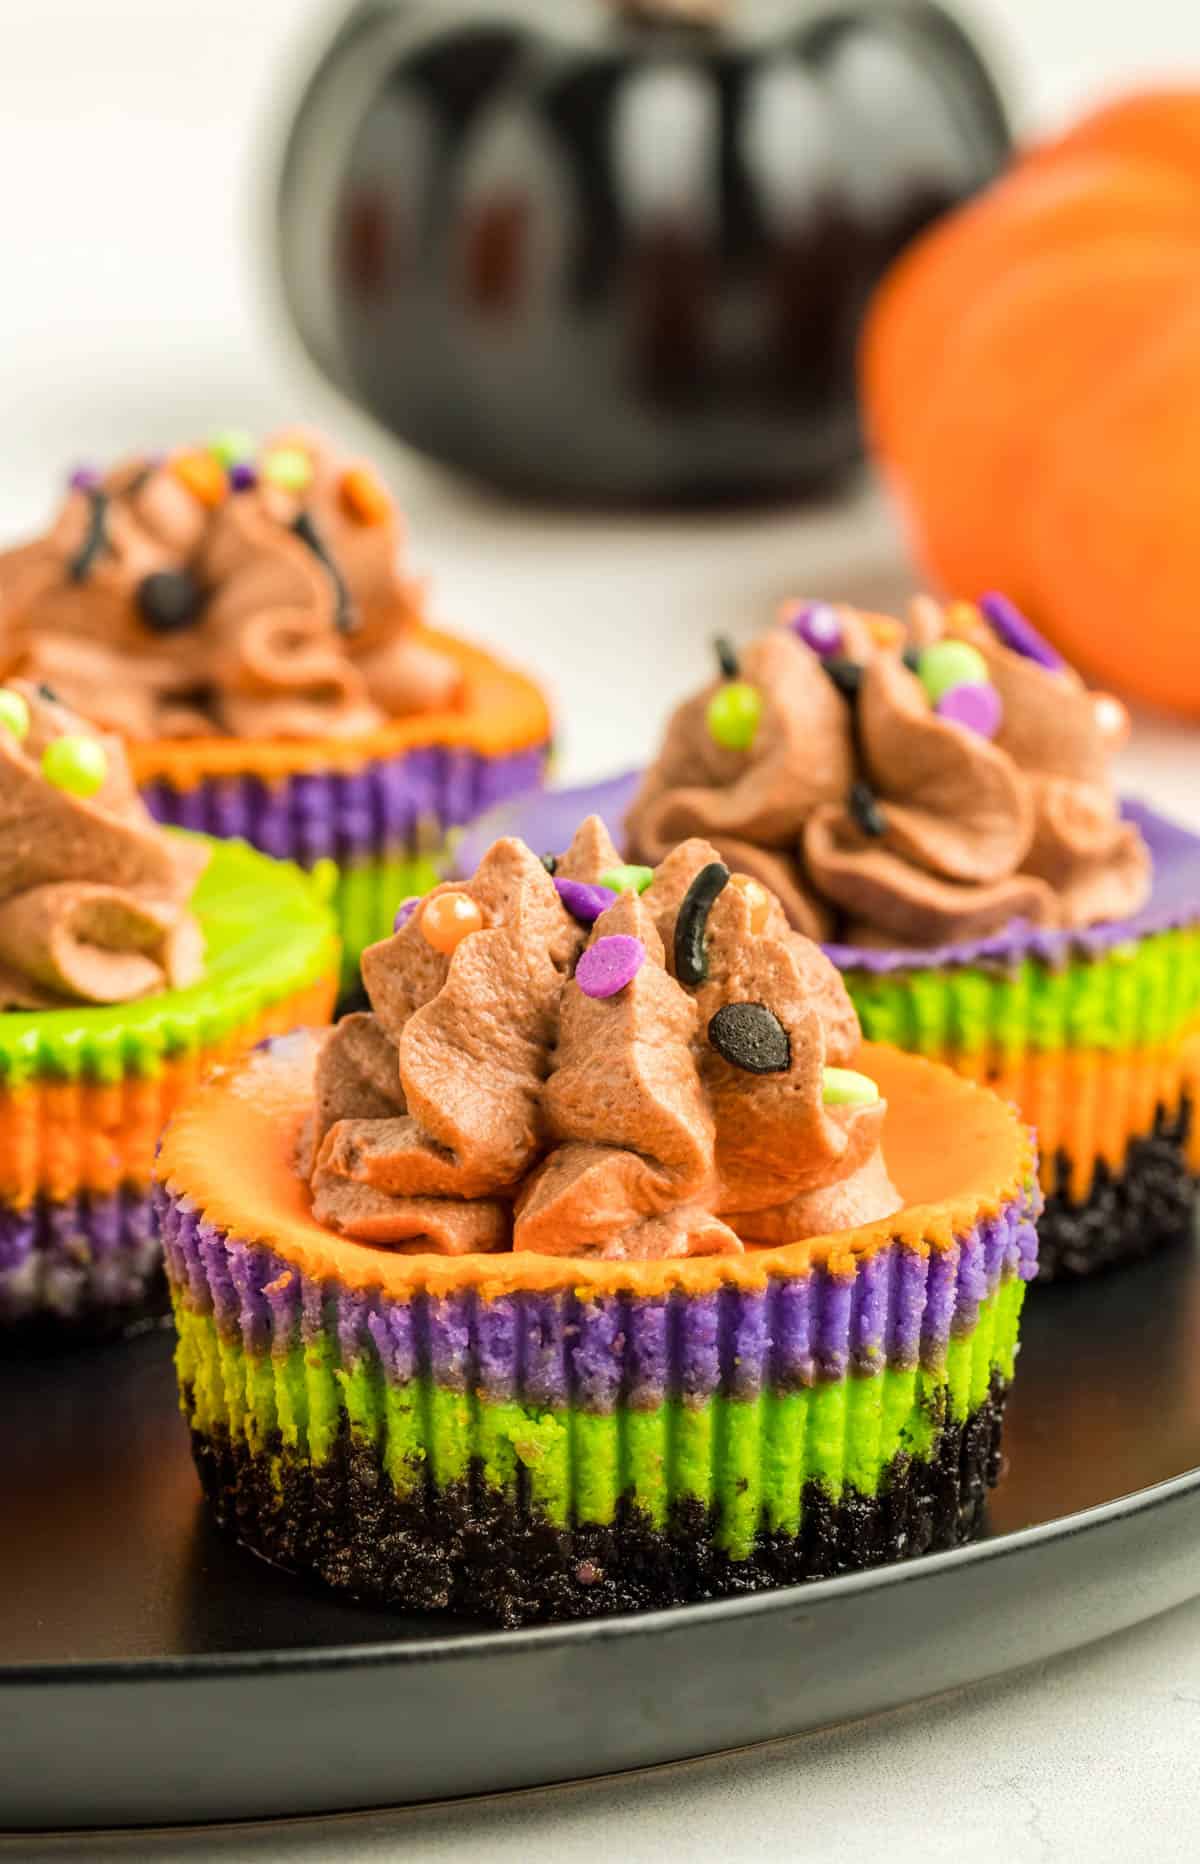
- Transfer whipped cream to a piping bag fitted with a piping tip of your choice. Pipe a dollop of cream onto each cheesecake and decorate with sprinkles.
- Chill the cheesecakes until you are ready to serve.
WHAT KIND OF CREAM CHEESE SHOULD I USE?
I recommend using the full fat cream cheese for the most flavor and creamy texture. It also sets up better with this cream cheese and always use the block of cream cheese.
You won’t get the same texture if trying to use the cream cheese from a container.
HOW LONG DOES THIS NEED TO SET UP?
Once you’ve removed the cheesecakes from the pan, you need to transfer them to the refrigerator for at least 3 hours. If you have the time, you can let them set for up to 24 hours.
CAN I ADD ANY ADDITIONS?
Sure! I just used the whipped cream on top and some Halloween Sprinkles, you can use other sprinkles or other decorative toppings.
Try some small diced up fruit or even other Halloween candy like some candy corn or the candy pumpkins.
HOW TO STORE:
Any of these leftover Mini Halloween Cheesecakes can be stored in an airtight container in the refrigerator where they will keep for up to 3 days.
You can freeze these cheesecakes in a freezer safe container without the whipped cream where they will keep for up to 3 months.
When you’re ready to enjoy the cheesecakes, thaw in the refrigerator overnight.
TIPS AND TRICKS:
- Feel free to add other toppings or trade out the flavors of things. Try different garnishes, sprinkles, candies, etc.
- You can freeze these, see my tips above.
- Make sure to grab the cream cheese blocks.
- These mini cheesecakes need to set for at least 3 hours, but can also set for up to 24 hours. Because of this time needed to set up, you can make these ahead of time very easily.
- Use a food processor to crush the Oreos and feel free to use whole cookies, no need to remove the cream filling.
- Leave your mixer on low speed. Do not increase the speed or you’ll introduce more air into the batter and that increases the risk of cracking the cheesecakes.
- I used a Wilton 2D tip to pipe the chocolate whipped cream on top of the mini cheesecakes.
Looking for the perfect mini dessert to make for Halloween, then you’ll love these simple Mini Halloween Cheesecakes. Colorful, fun and super tasty – sure to be a hit.
If you like this recipe you might also like:
If you’ve tried this MINI HALLOWEEN CHEESECAKES or any other recipe on my site, let me know in the comment section how it turned out, we love hearing from our readers! You can also follow along with me on PINTEREST, FACEBOOK and INSTAGRAM to see more amazing recipes and what shenanigans I’m getting into!
Mini Halloween Cheesecakes
Ingredients
Crust:
- 1 ¼ cup Oreos crushed (about 15 Oreos)
- 2 tablespoons unsalted butter melted
- ¼ teaspoon kosher salt
Filling:
- 16 ounces cream cheese room temperature
- ½ cup sour cream room temperature
- ½ cup granulated sugar
- 1 ½ teaspoons vanilla extract
- ¼ teaspoon kosher salt
- 2 large eggs room temperature
- 2-3 drops purple gel food color
- 2-3 drops orange gel food color
- 2-3 drops green gel food color
Chocolate Whipped Cream:
- ½ cup heavy whipping cream
- ⅓ cup powdered sugar
- 1 tablespoon cocoa powder
- Pinch of salt
- Sprinkles to decorate
Instructions
- Preheat the oven to 325 degrees F. Line a 12 well muffin pan with paper liners and set aside.
- Mix crushed Oreos, melted butter and salt in a bowl until well combined.
- Evenly distribute the mixture in the lined muffin pans. Press the crumb mixture down to create the crust for the cheesecakes.
- Bake the crusts for 5 minutes. Set aside to cool while you prepare the filling.
- To make the filling, mix the cream cheese and sour cream with a stand or hand mixer on low speed until smooth and well combined.
- Add the sugar, vanilla and salt and beat on low speed until well combined. Add eggs one at a time and beat on low until just combined.
- Divide the batter evenly into three separate bowls. Add the purple food color to one of the bowls and mix until just combined. Repeat with the orange and green food color in the remaining two bowls.
- Layer the colored batter onto the cooled crusts in one tablespoon increments. For example, one tablespoon of purple batter, topped with one tablespoon of orange batter, then one tablespoon of green batter. The order of the batter doesn’t matter here, you can get creative. Do this carefully so they do not mix, but if they do that is ok.
- Bake the cheesecakes for 15-20 minutes or until the top of the cheesecakes are set. Allow the cheesecakes to cool in the pan for one hour at room temperature. After an hour remove the cheesecakes from the pan and transfer to the refrigerator for at least 3 hours, or overnight.
- Once the cheesecakes have set, remove them from the paper wrappers and set aside while you prepare the chocolate whipped cream.
- Combine heavy cream, powdered sugar, cocoa powder and salt in a large bowl and whip until stiff peaks form.
- Transfer whipped cream to a piping bag fitted with a piping tip of your choice. Pipe a dollop of cream onto each cheesecake and decorate with sprinkles.
- Chill the cheesecakes until you are ready to serve.
Notes
- Feel free to add other toppings or trade out the flavors of things. Try different garnishes, sprinkles, candies, etc.
- You can freeze these, see my tips above.
- Make sure to grab the cream cheese blocks.
- These mini cheesecakes need to set for at least 3 hours, but can also set for up to 24 hours. Because of this time needed to setup, you can make these ahead of time very easily.
- Use a food processor to crush the Oreos and feel free to use whole cookies, no need to remove the cream filling.
- Leave your mixer on low speed. Do not increase the speed or you'll introduce more air into the batter and that increases the risk of cracking the cheesecakes.
- I used a Wilton 2D tip to pipe the chocolate whipped cream on top of the mini cheesecakes.
Nutrition
Tornadough Alli is not a nutritionist or dietitian, and any nutritional information shared is an estimate. If calorie count and nutritional value is important to you, we recommend running the ingredients through whichever online nutritional calculator you prefer. Calories and values can vary depending on which brands were used.
Darrin
You need to add preparation instructions to the recipe card. Otherwise when I print it out it won’t be on it.
Tornadough Alli
Thank you for pointing that out! I have no idea how it did not get in there. I have updated it and the instructions are now included in the recipe card.