Fluffy heart cookies with a cream cheese filling these Red Velvet Whoopie Pies are a fun Valentines treat that everyone can enjoy! Tasty, pretty and the perfect dessert for a loved one.

I’m a huge Whoopie Pie fan, always have. I love when you get two cookies that encase frosting, it’s like the best of both worlds. These Red Velvet Whoopie Pie are one of my favorites.
Now we usually make these during Valentines Day, obviously they are hearts, you can absolutely make these in any shape like the normal round ones as well.
That way they can be used for any time of the year. Red Velvet is one of my favorite flavors so we absolutely make red velvet desserts all year long, too good to pass up.
These are not only fun, especially for kids. They are super flavorful, with the cream cheese filling it really sets these off with the combination of the red velvet.
These are also completely homemade which when I can, I adore making homemade desserts. I’m not opposed to semi-homemade at all, but these taste so good I always make them homemade.
The hearts may seem out of your wheelhouse but I guarantee you that I will show you step by step below on how it can easily be done!
Some of our other favorite cookie type recipes that we have on our site include: Chewy Sugar Cookies, Lemon Sandwich Cookies and Oatmeal Cream Pies.
WHY THIS RECIPE WORKS:
- This can easily be doubled to make more to save for later or give as gifts.
- You can change up the frosting in the center to suit your taste.
- They can be made into circles rather than hearts if you’d like.
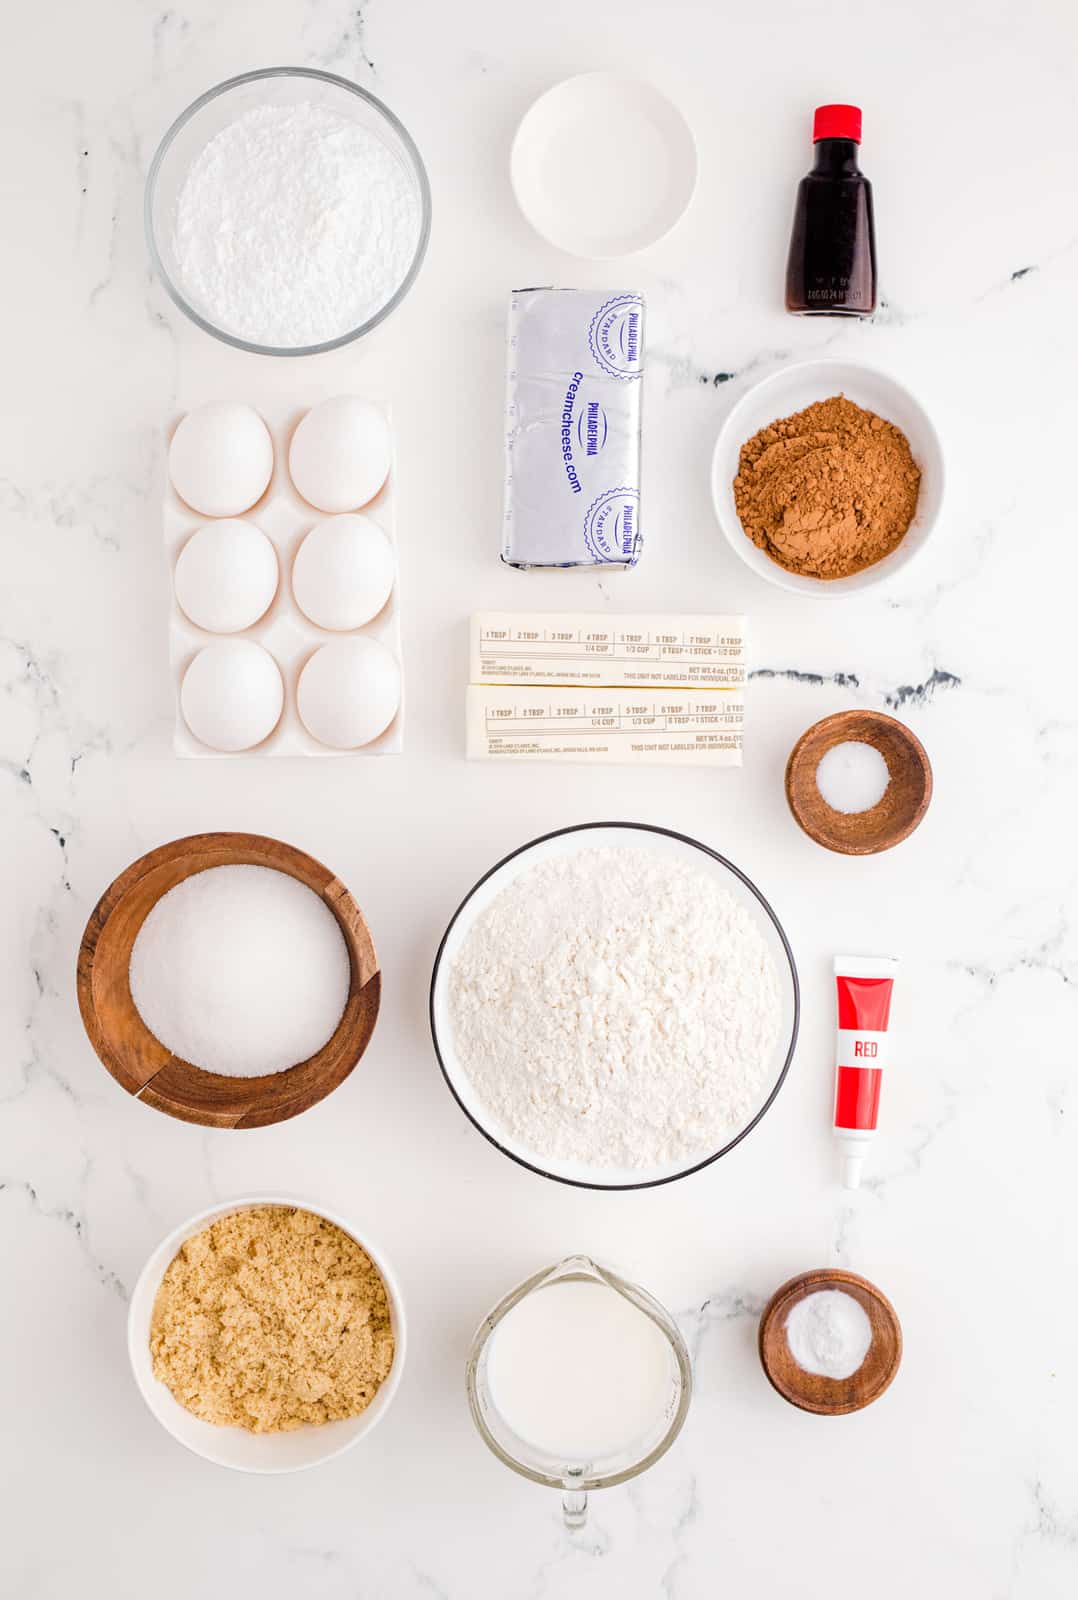
INGREDIENTS NEEDED (FULL RECIPE AT BOTTOM):
All-purpose flour
Cocoa powder
Baking soda
Salt
Salted butter
Granulated sugar
Grown sugar
Eggs
Buttermilk
White vinegar
Vanilla
Red gel food coloring
Cream cheese, softened
Powdered sugar
HOW TO MAKE RED VELVET WHOOPIE PIES, STEP BY STEP:
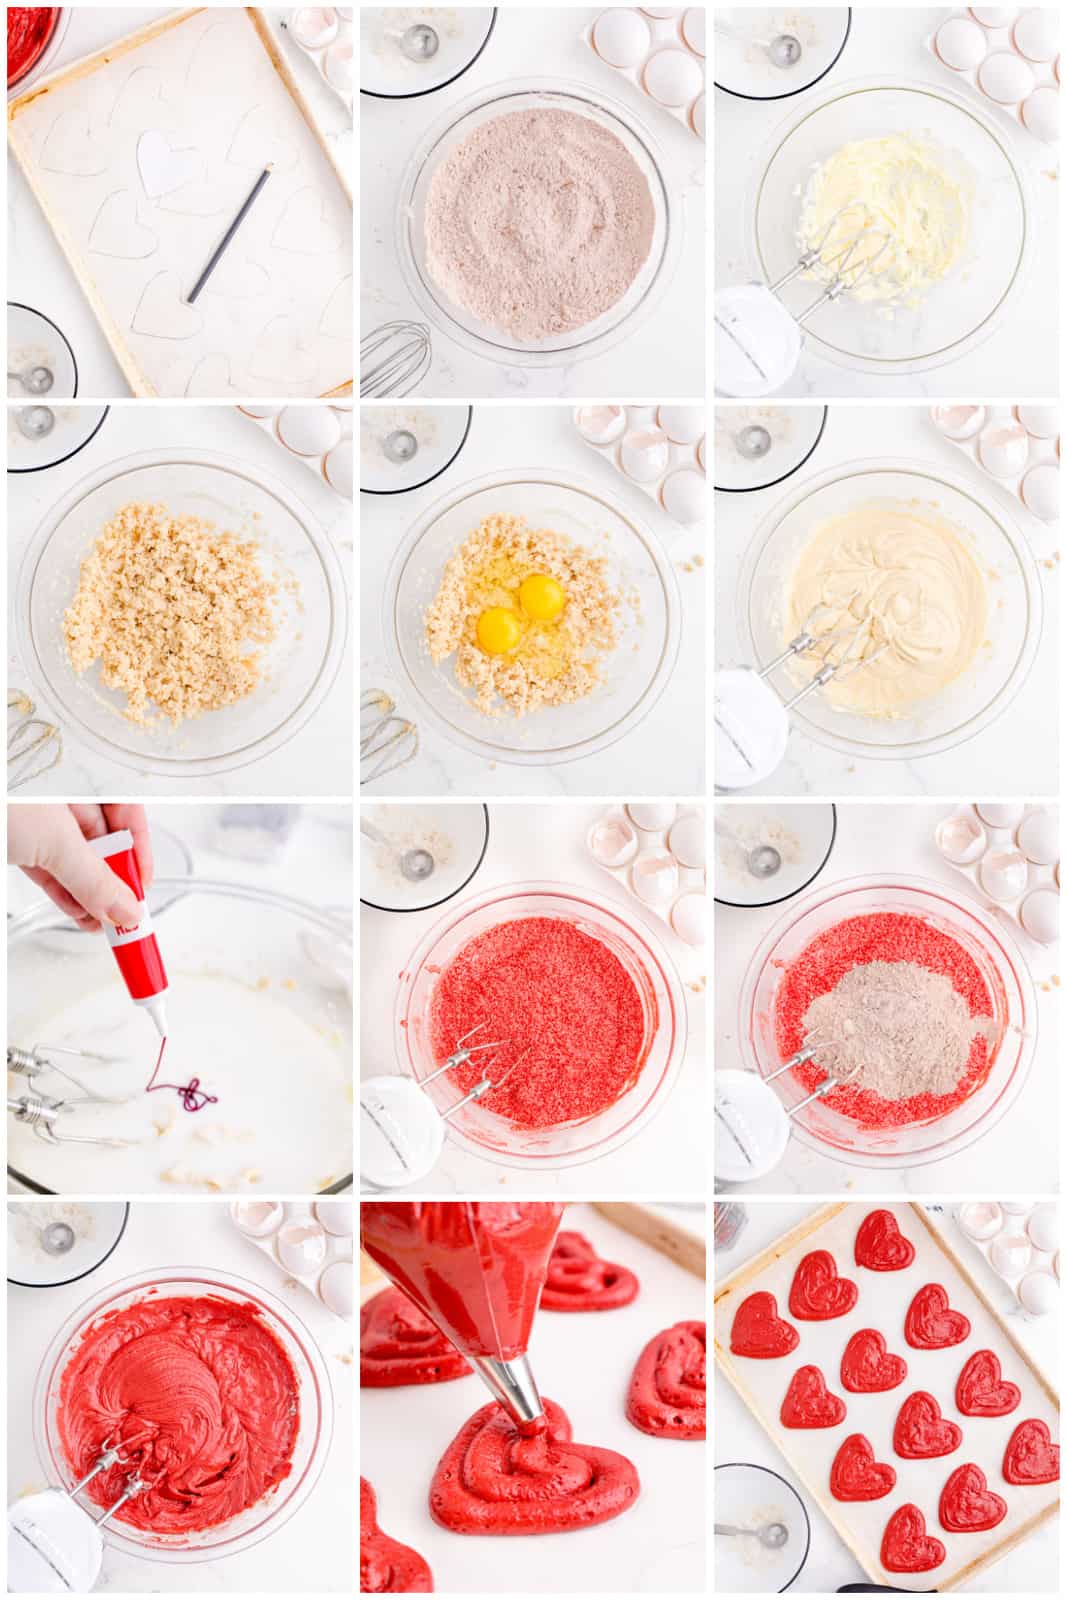
- Preheat the oven to 350 degrees. Line 2 baking sheets with parchment paper.
- Stencil heart shapes all over the parchment paper (leaving about an inch of space between each). I find it easiest to trace a small heart-shaped cookie cutter, but you may make a template for yourself. We want all of the hearts to be the same size. Then flip the parchment paper over so that you can still see the hearts but will not be placing batter directly on the pencil markings.
- Whisk together the flour, cocoa, baking soda, and salt in a medium mixing bowl.
- In a separate, large bowl, use a stand mixer or handheld mixer, cream the butter. Beat it on high power until it is creamy. Add in the white sugar and brown sugar and beat this for at least 3 minutes on medium high speed until it is fluffy.
- Next, beat in the eggs until smooth.
- Add the buttermilk and mix only as needed.
- Now, add the dry ingredients to the wet ingredients.
- Mix this together on low speed until just mixed. Then add the vinegar and vanilla, again mixing until just mixed. You do not want to over mix the batter..
- Place the batter into a piping bag with a Wilton 1A round tip. If you don’t have one, you could cut the corner out of a large zip-lock bag and this will work as well.
- Pipe the batter into heart shapes leaving about two inches of space between them. The cookies will spread while baking. I find it easiest to pipe an outline of the heart and then fill it in then smooth out the batter a bit with a spatula.
- Bake for 10-12 minutes until completely set up.
- Allow to cool slightly on the pan, then remove them to a wire rack to cool completely.
ASSEMBLY:
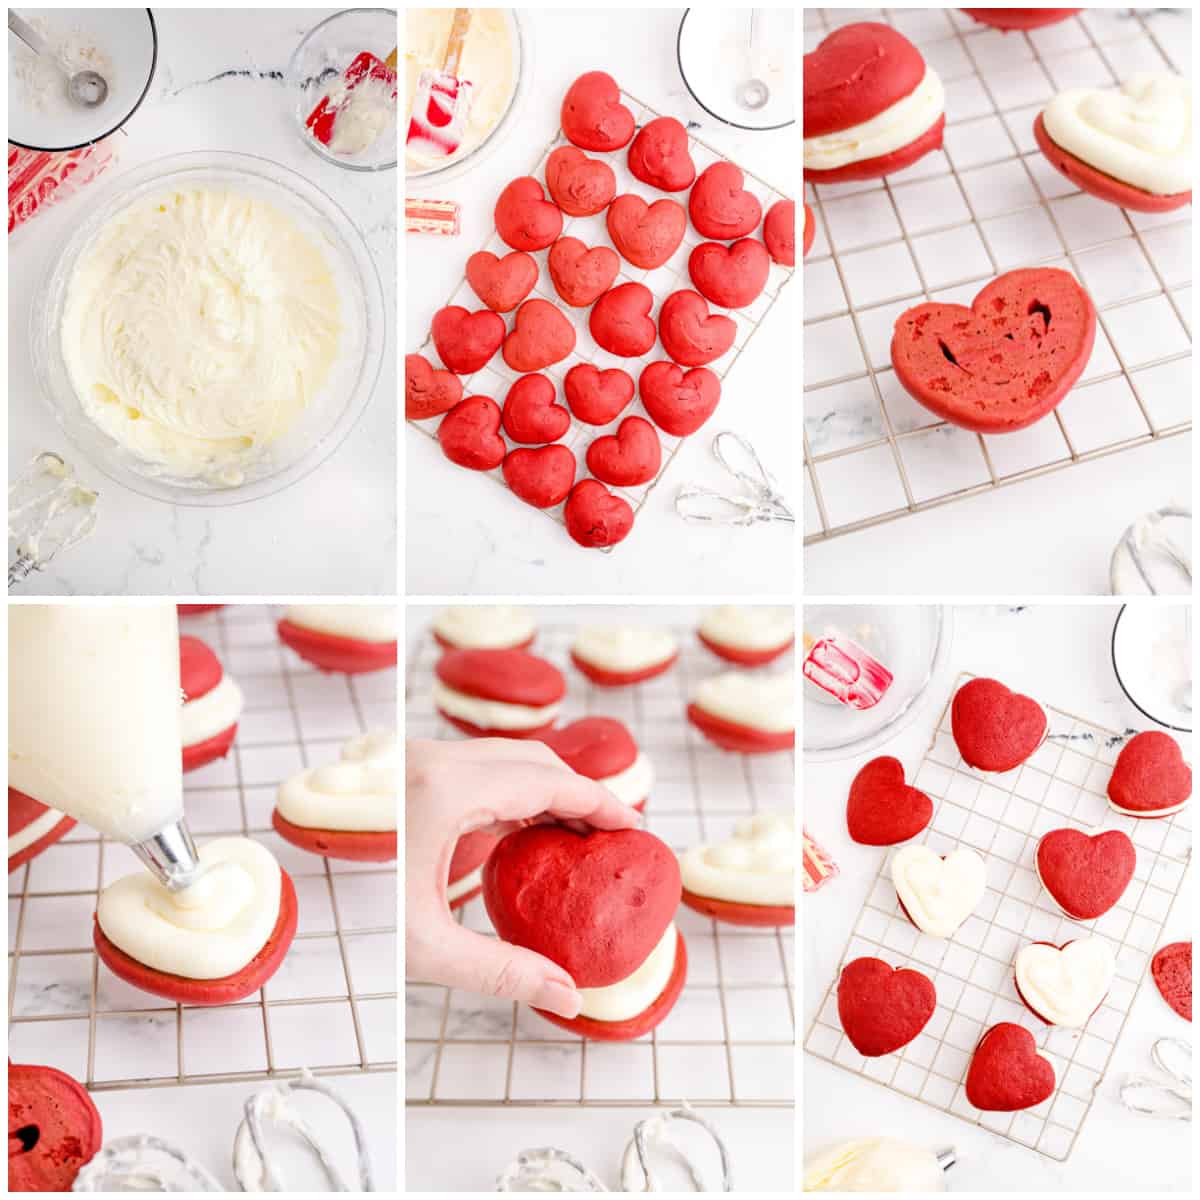
- While the cookies are cooling, make the filling. Beat the cream cheese and softened butter together until light and fluffy. Then add the powdered sugar 1 cup at a time and beat for another minute or two after each addition until creamy.
- Once cookies are cool match up pairs of cookies that are similar in shape and size.
- Spread (or pipe with a Wilton 1A tip) about 2 Tablespoons of filling onto the flat side of one cookie and gently top it with a matching cookie.
IS THERE A SHORTCUT FOR THESE?
If you want to make theses quicker and not homemade you could use a boxed red velvet cake mix. Or you could use a can of prepared cream cheese frosting.
This will reduce the time and effort, and if you want to get kids involved that are just learning to bake, that would be a good route to go!
CAN I MAKE THE BATTER AHEAD OF TIME?
Yes, you may prepare the batter, cover it and keep it in the refrigerator where it will keep for up to 3 days.
The cream cheese filling may be stored the same way. When you are ready to bake the cookies, just allow the batter to come to room temperature before using it.
DO I HAVE TO USE GEL FOOD COLORING?
No, you don’t. The reason why we use gel is that there is more concentrate of color in it and you will use less to get the desired color that you would if you were to use liquid food coloring.
WHAT OTHER FROSTINGS CAN I USE?
If you are not a fan of cream cheese frosting, which usually is the natural pairing with red velvet there are some other options. You can use a regular vanilla buttercream, chocolate or even a nutella flavored!
HOW TO STORE:
These can be stored in an airtight container in the refrigerator where they will last for up to 5-6 days.
These can also be frozen. We freeze them assembled, we like to wrap individually in plastic wrap and then place in a freezer container or bag.
Let defrost in the refrigerator before eating.
TIPS AND TRICKS:
- You can use a cake mix and canned frosting to make these quicker.
- Easily double this recipe to serve more people, give as gifts or save for later.
- Other frostings can be used, see my tips above.
- If you want more color, roll the sides in sprinkles.
- These can be frozen, see my tips above.
- You can make these into circles if you do not want to make hearts.
If you want a fun Valentines treat or something red velvet that you can make all year round then you need to make my Red Velvet Whoopie Pies.
If you like this recipe you might also like:
If you’ve tried these RED VELVET WHOOPIE PIES or any other recipe on my site, let me know in the comment section how it turned out, we love hearing from our readers! You can also follow along with me on PINTEREST, FACEBOOK and INSTAGRAM to see more amazing recipes and what shenanigans I’m getting into!

Red Velvet Whoopie Pies
Ingredients
Whoopie Pies:
- 2 ½ cups all-purpose flour
- ¼ cup unsweetened cocoa powder
- 1 teaspoon baking soda
- ½ teaspoon salt
- ½ cup salted butter softened
- ⅔ cup granulated sugar
- ⅔ cup brown sugar
- 2 eggs
- 2 cups buttermilk
- 1 teaspoon white vinegar
- 2 teaspoons vanilla
- 4 Tablespoons red gel food coloring or more depending how red you want your these to be
Filling:
- 8 ounces cream cheese softened
- ½ cup salted butter softened
- 2 ½ cups powdered sugar
Instructions
- Preheat the oven to 350 degrees. Line 2 baking sheets with parchment paper.
- Stencil heart shapes all over the parchment paper (leaving about an inch of space between each). I find it easiest to trace a small heart-shaped cookie cutter, but you may make a template for yourself. We want all of the hearts to be the same size. Then flip the parchment paper over so that you can still see the hearts but will not be placing batter directly on the pencil markings.
- Whisk together the flour, cocoa, baking soda, and salt in a medium mixing bowl.
- In a separate, large bowl, use a stand mixer or handheld mixer, cream the butter. Beat it on high power until it is creamy. Add in the white sugar and brown sugar and beat this for at least 3 minutes on medium high speed until it is fluffy.
- Next, beat in the eggs until smooth.
- Add the buttermilk and mix only as needed.
- Now, add the dry ingredients (the flour mixture) to the wet ingredients (the buttermilk, egg mixture).
- Mix this together on low speed until just mixed. Then add the vinegar and vanilla, again mixing until just mixed. You do not want to over mix the batter..
- Place the batter into a piping bag with a Wilton 1A round tip. If you don’t have one, you could cut the corner out of a large zip-lock bag and this will work as well.
- Pipe the batter into heart shapes leaving about two inches of space between them. The cookies will spread while baking. I find it easiest to pipe an outline of the heart and then fill it in then smooth out the batter a bit with a spatula.
- Bake for 10-12 minutes until completely set up. Allow to cool slightly on the pan, then remove them to a wire rack to cool completely.
- While the cookies are cooling, make the filling. Beat the cream cheese and softened butter together until light and fluffy. Then add the powdered sugar 1 cup at a time and beat for another minute or two after each addition until creamy.
- Once cookies are cool match up pairs of cookies that are similar in shape and size. Spread (or pipe with a Wilton 1A tip) about 2 Tablespoons of filling onto the flat side of one cookie and gently top it with a matching cookie. (Don’t squeeze too hard or the filling will squish out.)
Notes
- You can use a cake mix and canned frosting to make these quicker.
- Easily double this recipe to serve more people, give as gifts or save for later.
- Other frostings can be used, see my tips above.
- If you want more color, roll the sides in sprinkles.
- These can be frozen, see my tips above.
- You can make these into circles if you do not want to make hearts.
Nutrition
Tornadough Alli is not a nutritionist or dietitian, and any nutritional information shared is an estimate. If calorie count and nutritional value is important to you, we recommend running the ingredients through whichever online nutritional calculator you prefer. Calories and values can vary depending on which brands were used.





Leave a Reply