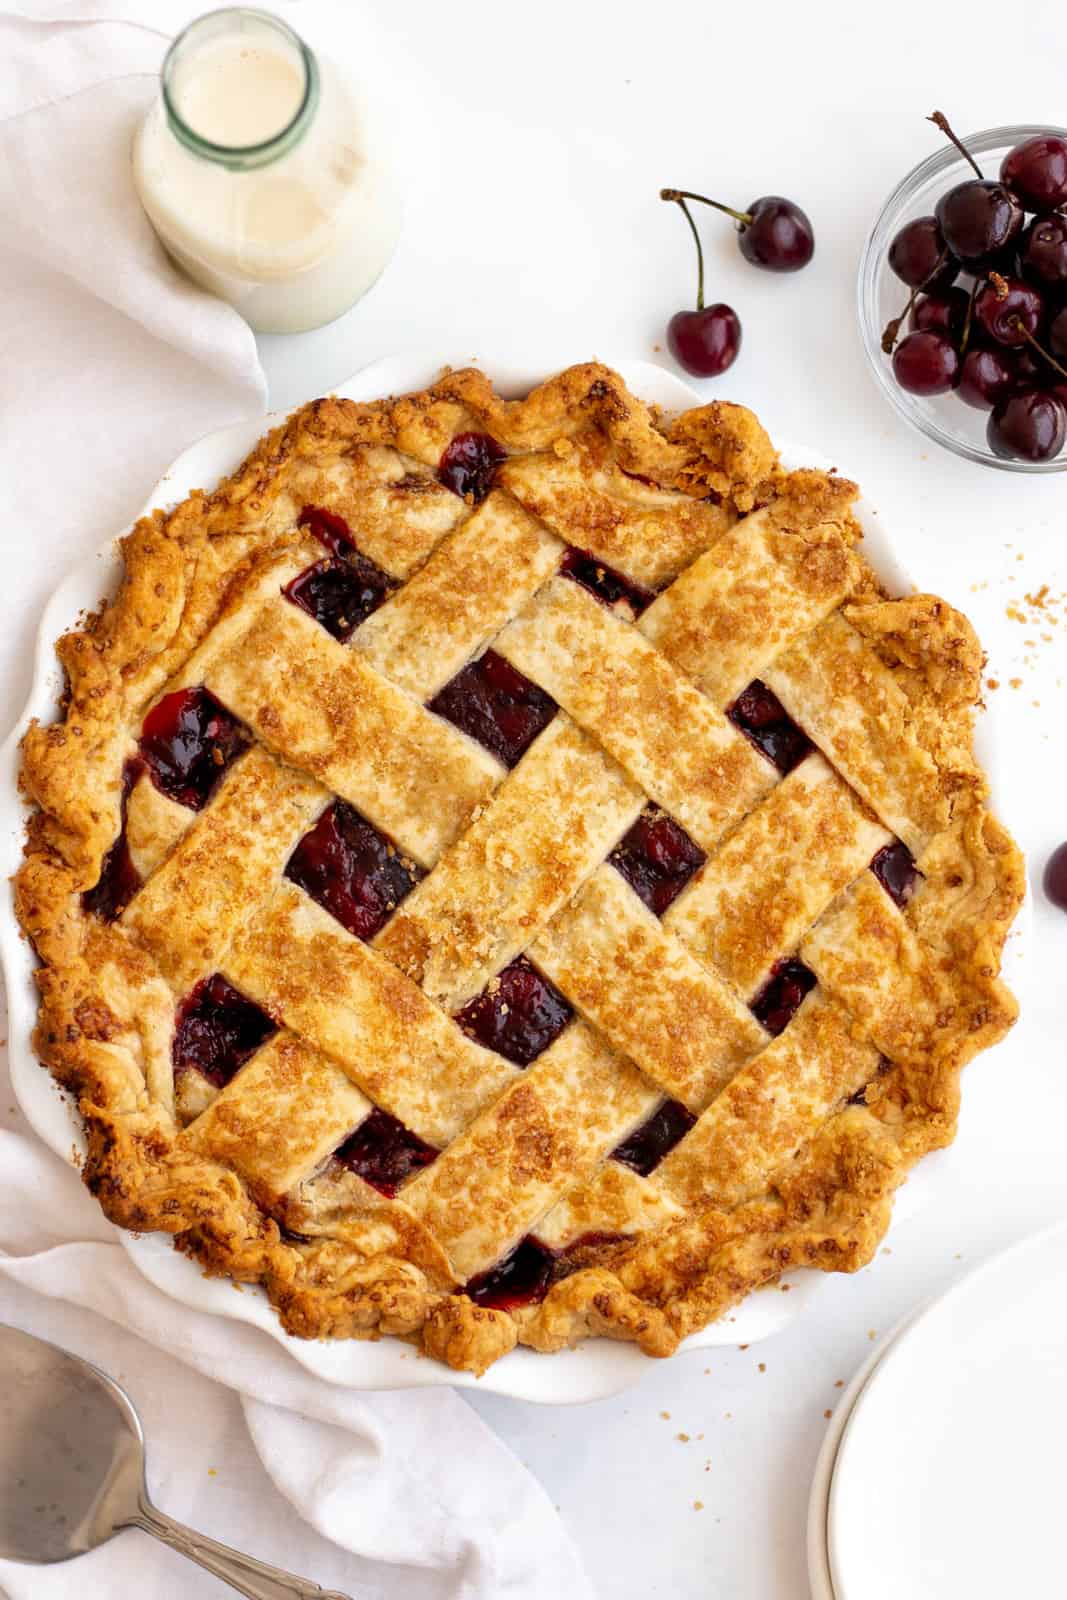
Completely homemade and absolutely delicious this Cherry Pie Recipe is one recipe that you need in your recipe box. Sweet, flavorful and such a classic.

If I had to say what my favorite pie of all time was it would be Cherry Pie. There is something about Cherry Pie that I can’t get over. It is just absolutely delicious.
I have an affliction to anything cherry flavored so that might provide a part of why a Cherry Pie Recipe has always been my favorite but I can say with 100% that is is.
That is why I had to finally share my absolutely 100% homemade Cherry Pie Recipe with you guys! I hope you fall in love with it just as much as we have.
It is one of those requests that are always made when we have gatherings because they can’t resist my pie, so that always has to make you smile, I love when people love my recipes.
So if you love pies, then trust me this one is one that you will want to make. Plus I believe people should always have those homemade staples in their recipe box.
Some of my other favorite pie recipes include Blueberry Pie, Coconut Cream Pie and this classic old-fashioned Impossible Pie.
WHY THIS RECIPE WORKS:
- Completely homemade there are no shortcuts in this recipe.
- You can substitute refrigerated pie crust if you do not want to make homemade.
- The sugar topping adds just a little bit more sweetness to each bite!
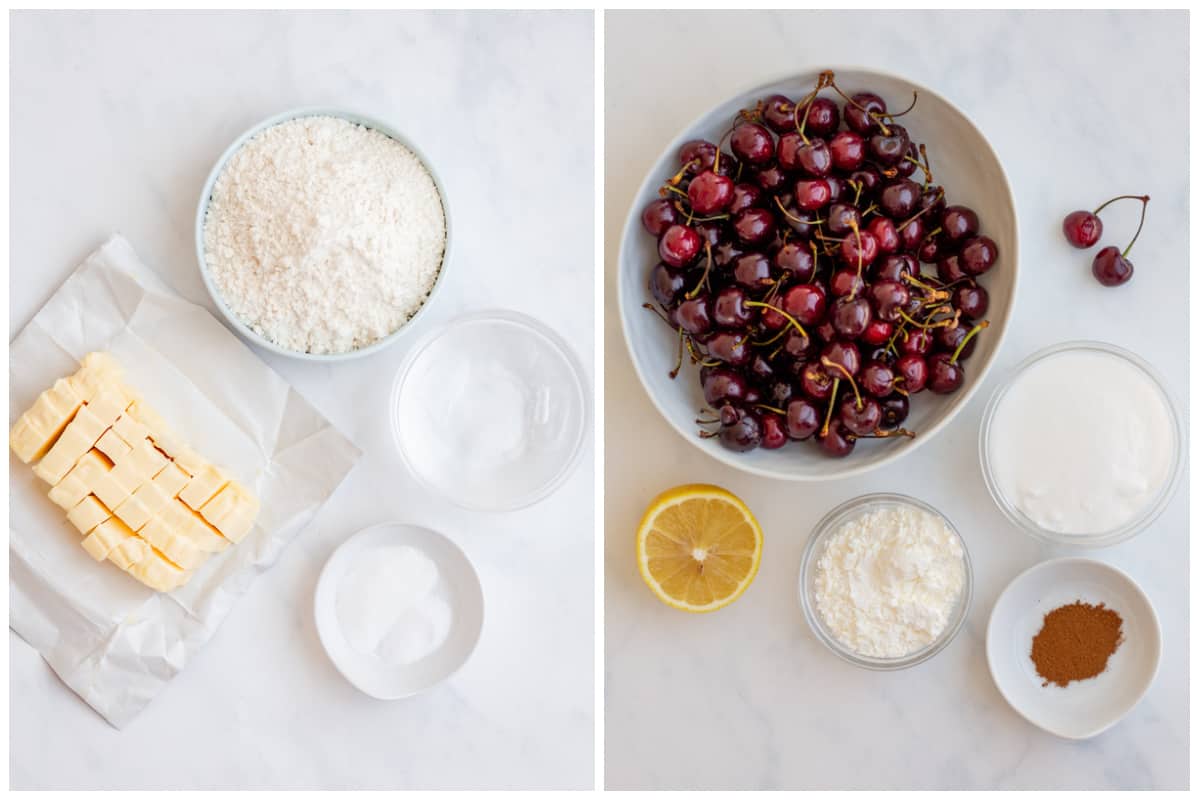
INGREDIENTS NEEDED (FULL RECIPE AT BOTTOM):
All purpose flour
Granulated sugar
Salt
Unsalted butter
Ice cold water
Cherries
Lemon juice
Cornstarch
Cinnamon, optional
Egg
Milk
Coarse sugar, optional
HOW TO MAKE A CHERRY PIE RECIPE, STEP BY STEP:
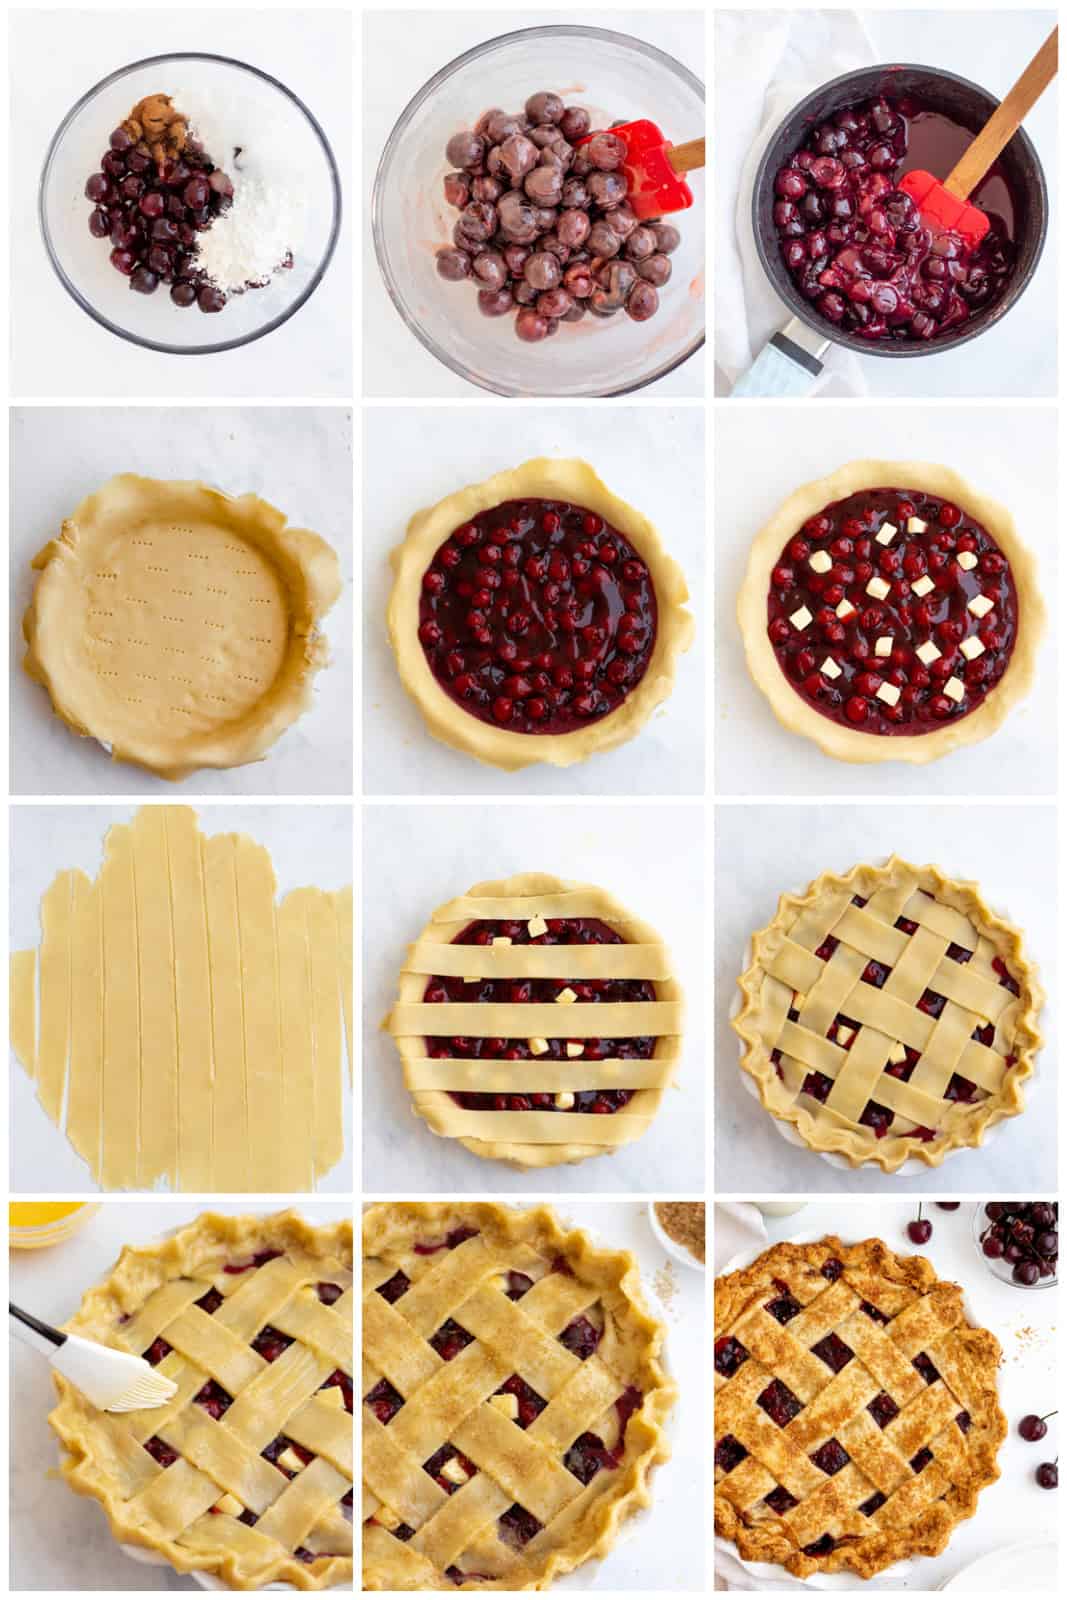
- In a food processor, pulse the flour, sugar, salt and cinnamon a few times to combine.
- Add the cold diced butter and pulse the mixture until it resembles coarse meal (pea size pieces with bigger pieces of butter it’s ok). Mixture should be powdery and dry.
- Add the ice cold water and pulse a few more times. The dough should stick together in between your fingers, if not add a tablespoon of water until it does.
- Transfer the dough to a clean work surface and form 2 equal size pieces of dough. Wrap in plastic wrap and refrigerate for one hour until you are ready to use for your cherry pie.
- Meanwhile prepare the cherry pie filling; in a saucepan, over medium heat add your pitted cherries, sugar, lemon juice, cornstarch and cinnamon and stir to combine.
- Bring to a boil and cook for 8-10 minutes or until the mixture has thickened. If the mixture looks a bit dry, add a splash of water. Remove from the heat and allow to cool slightly. Set aside.
- To make the cherry pie, preheat the oven to 350ºF. Remove the pie dough from the plastic wrap and on a clean surface dusted with flour roll the dough with a rolling pin. Roll the first piece of dough into a 13” circle and transfer to a 9” wide pie pan. The edges should hang a little over the edges of the pie dish.
- Fill with the cherry pie filling, and add the cold butter cubes all over the filling.
- Roll the second piece of dough into a 12” circle and use a pizza cutter or a knife to slice into ten 1 inch strips. Create a lattice crust over the top (see tips below). Tuck in the excess dough at the edges.
- In a small bowl, beat the egg with the milk or the melted butter and brush over the lattice crust and edges of the pie. Sprinkle the top with the coarse sugar. Bake for 40 minutes or until the cherry filling is bubbly and the crust is golden.
Pies really aren’t that hard in the whole perspective of things, it is more or less the different steps that it takes when you are making it all from scratch.
But we don’t mind it at all. We sometimes use refrigerated pie crust for this recipe to shorten the time on this pie, but we really love this homemade pie crust!
WHAT IF MY PIE DOUGH IS TOO HARD?
If your pie dough has been sitting in the refrigerator for too long it will harden because of the butter.
Let it rest at room temperature for 15-20 minutes or until it’s easy to roll out with a rolling pin. Don’t worry, this happens often when you aren’t paying attention and happens to us.
CAN I MAKE PIE DOUGH IN ADVANCE?
You sure can! You can prepare the dough and refrigerate it for up to 3 days. Let it rest at room temperature until it’s easy to roll out with a rolling pin.
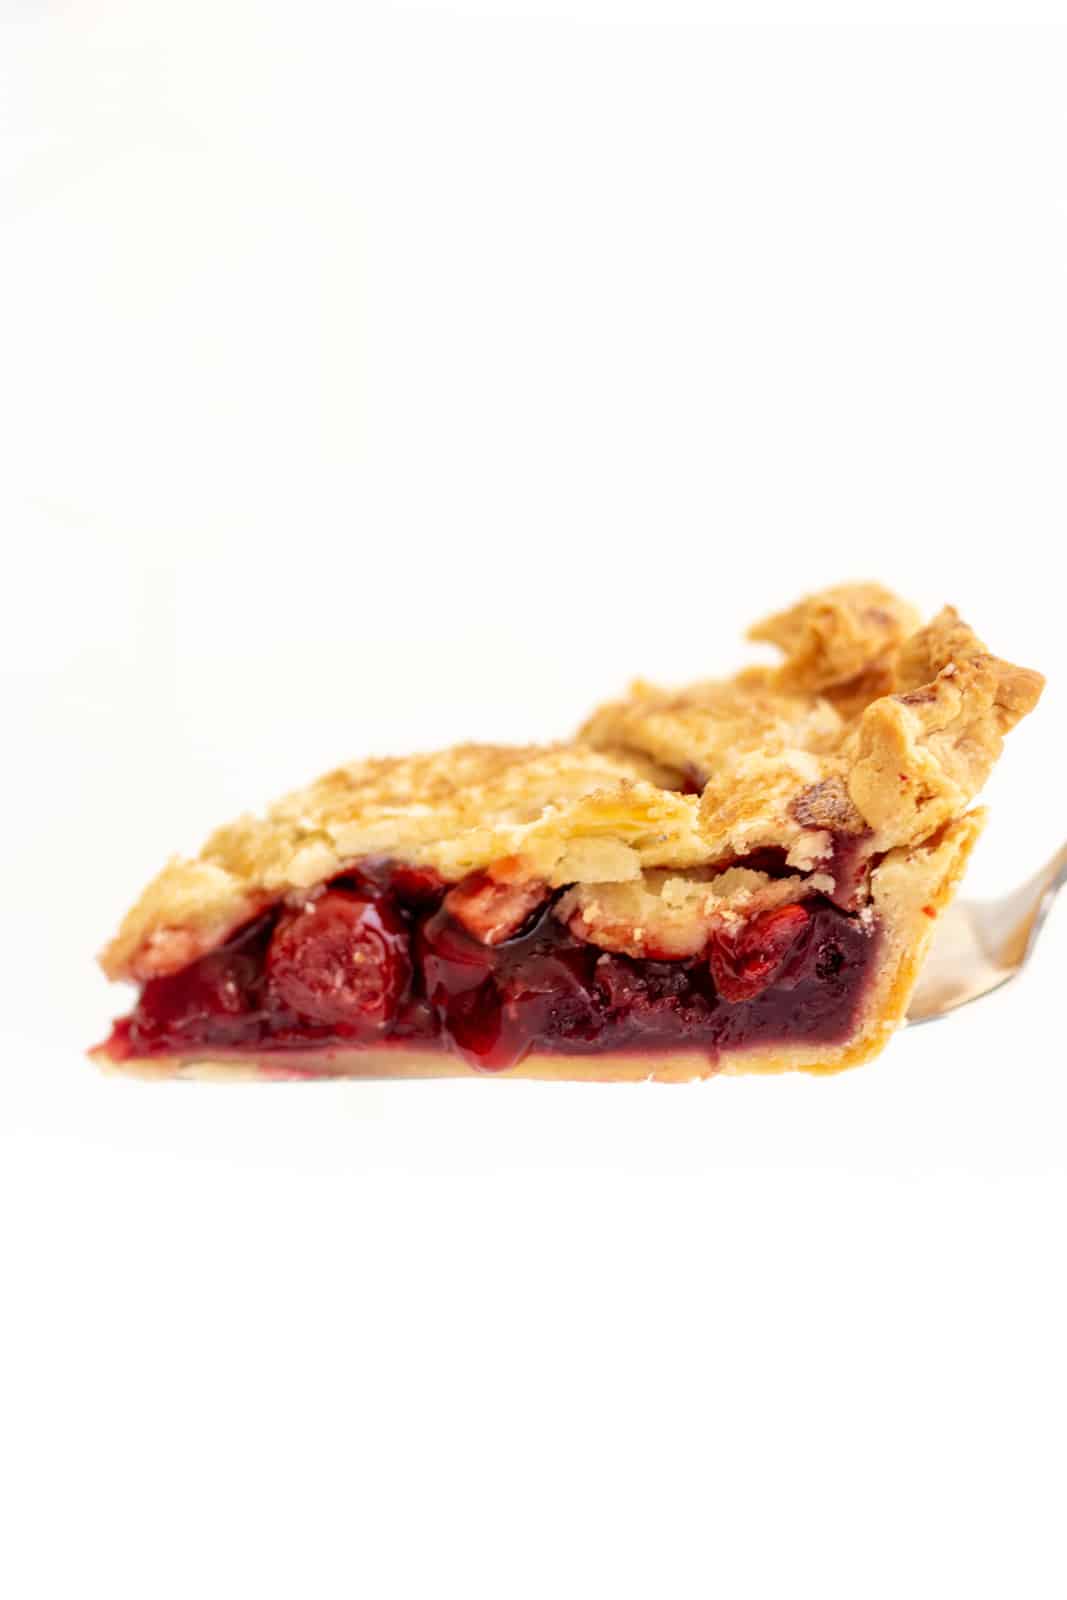
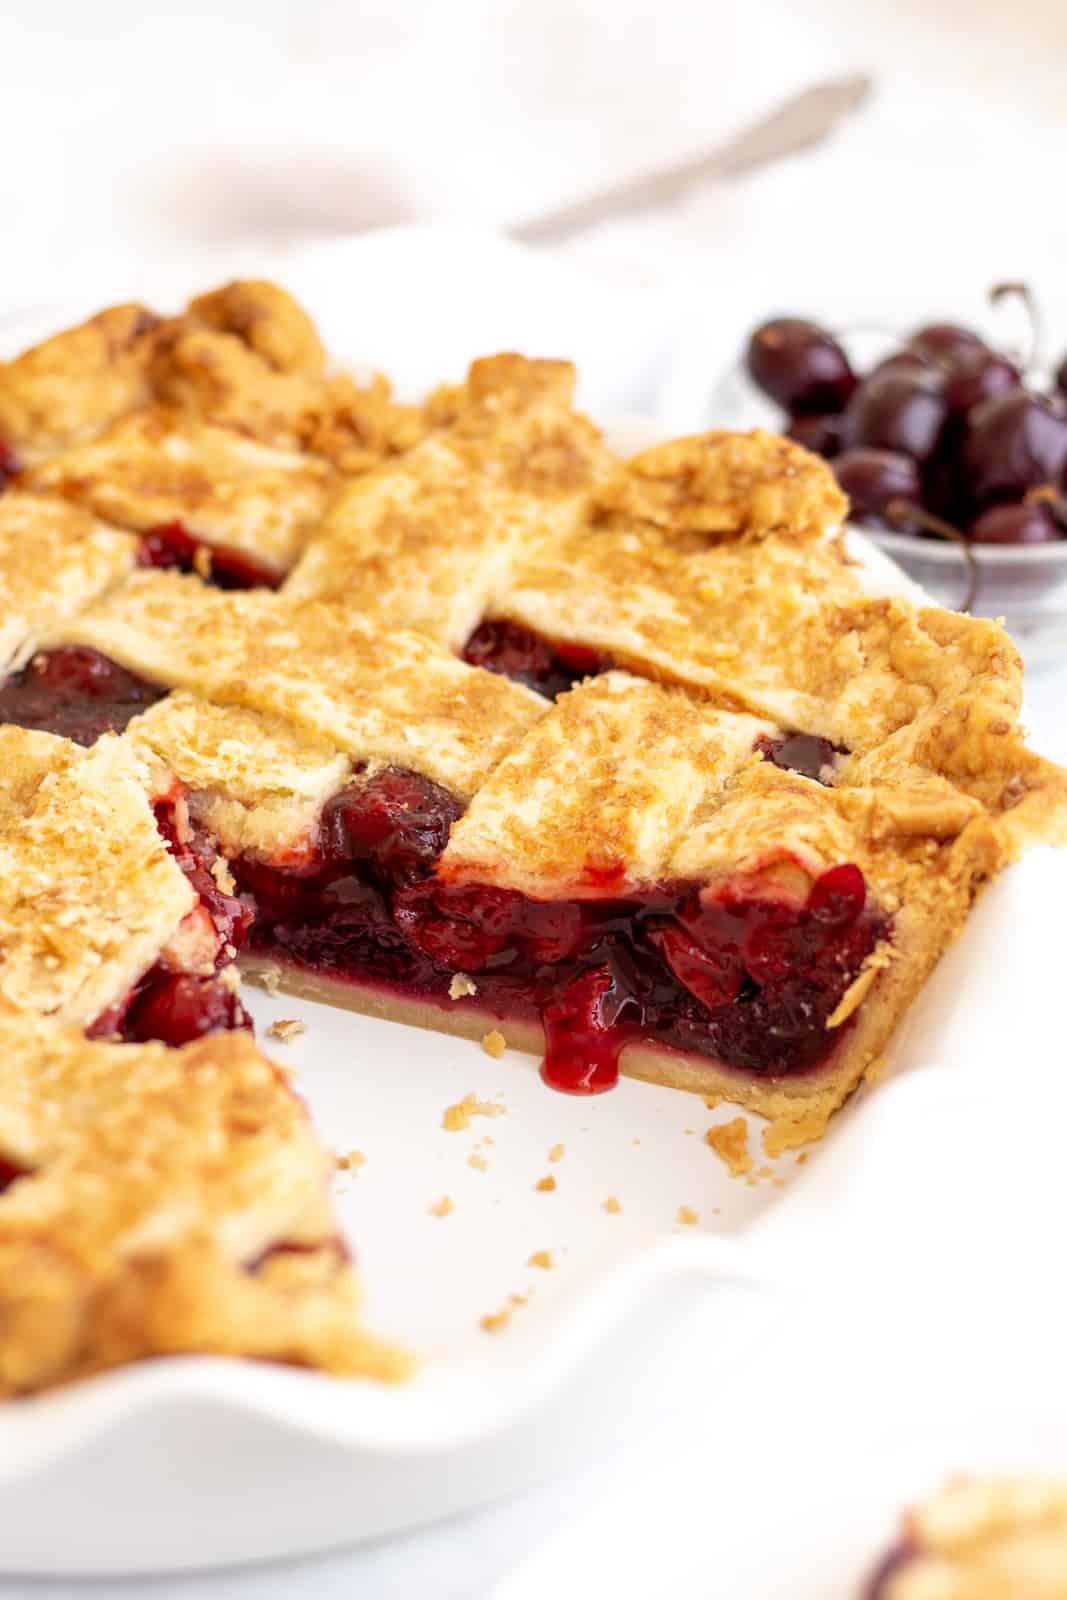
See how good this pie holds together when sliced? This is why I love both the filling and the crust for this Cherry Pie Recipe, everything just works together well and is all around a great recipe.
HOW DO I MAKE A LATTICE PIE CRUST?
First place 5 strips of dough horizontally over the pie filling, longer strips in the center and shorter strips towards the edges.
Fold back the 2nd and 4th strips halfway and place a long vertical strip of dough in the center.
Fold the strips back over the new line then fold back the alternate strips (1st, 3rd and 5th). Continue by adding and alternating the strips then switch to the other side of the pie, until the lattice is complete.
You can also watch this tutorial that will show you how the proper way to lattice a pie crust is.
DO I NEED TO DO A LATTICE TOPPING?
If you do not want to attempt a lattice topping you certainly do not have to. You can layer the top pie crust over the filling and crimp the edges, you will want to cut slits in the middle of the pie for it to vent.
You will also still want to brush the whole pie with the butter or milk so it will brown nicely and add the decorators sugar if you desire.
CAN I USE FROZEN CHERRIES FOR THIS CHERRY PIE RECIPE?
Frozen cherries will work great since they are already pitted, plus you don’t have to worry if they are not in season.
You can make cherry pie all year round. Thaw your frozen cherries very well before using to make the cherry pie filling. Let them sit in a colander to drain well.
Look at that sugar topping. That part really gets me and I love adding the sugar topping to my pies. I really just love that extra sweetness take over. It is not overpowering but works well.
HOW DO I KNOW WHEN MY PIE IS DONE?
Your pie will be done when the crust is golden on top and you can see the filling bubbling around the edges and in the center of the pie. You do not want your pie to not be golden.
You can tent this recipe or use pie shields around crust so it does not turn too brown too fast, you do this because of the length the pie bakes and you want an even browning around the whole pie.
HOW TO STORE:
To store this Cherry Pie Recipe you will want to let it cool and keep any remaining pieces in the pie pan. Cover loosely with foil or plastic wrap and it should keep refrigerated up to 5 days.
This can also be frozen, to do this let your pie cool fully and then wrap tightly with foil or plastic wrap then place in a freezer bag. Place in your freezer and it should keep for up to 4 months.
To defrost, remove to your refrigerator and let sit overnight before serving.
TIPS AND TRICKS:
- You can use a refrigerated crust if you would like to instead of a homemade crust.
- Frozen cherries can be used in replace of fresh, see my tips above.
- This can be frozen for later use, see my tips above.
- You do not have to lattice your top if you do not want to, see my tips above on an alternative.
- Let the pie cool slightly before slicing to allow the filling to set up.
If you want the perfect homemade pie then you have to make my delicious Cherry Pie Recipe, I promise you will love it just as much as we do!
If you like this recipe you might also like:
If you’ve tried this CHERRY PIE RECIPE or any other recipe on my site, let me know in the comment section how it turned out, we love hearing from our readers! You can also follow along with me on PINTEREST, FACEBOOK and INSTAGRAM to see more amazing recipes and what shenanigans I’m getting into!

Cherry Pie Recipe
Ingredients
For the homemade pie crust:
- 2 1/2 cups all purpose flour plus more to dust
- 1 Tbs granulated sugar
- 1/2 tsp salt
- 1/2 lb cold unsalted butter cut into cubes
- 6 Tbs ice cold water
For the cherry pie filling:
- 4 cups fresh cherries pitted
- 1 cup granulated white sugar
- Lemon juice from half a lemon around 2 tablespoons
- 1/4 cup corn starch
- 1/2 tsp cinnamon optional
For the cherry pie:
- 2 Tbs cold butter tiny cubed
- 1 egg
- 1 Tbs milk or unsalted butter melted
- 1 Tbs coarse sugar optional
Instructions
- In a food processor, pulse the flour, sugar, salt and cinnamon a few times to combine.
- Add the cold diced butter and pulse the mixture until it resembles coarse meal (pea size pieces with bigger pieces of butter it’s ok). Mixture should be powdery and dry.
- Add the ice cold water and pulse a few more times. The dough should stick together in between your fingers, if not add a tablespoon of water until it does.
- Transfer the dough to a clean work surface and form 2 equal size pieces of dough. Wrap in plastic wrap and refrigerate for one hour until you are ready to use for your cherry pie.
- Meanwhile prepare the cherry pie filling; in a saucepan, over medium heat add your pitted cherries, sugar, lemon juice, cornstarch and cinnamon and stir to combine.
- Bring to a boil and cook for 8-10 minutes or until the mixture has thickened. If the mixture looks a bit dry, add a splash of water. Remove from the heat and allow to cool slightly. Set aside.
- To make the cherry pie, preheat the oven to 350ºF. Remove the pie dough from the plastic wrap and on a clean surface dusted with flour roll the dough with a rolling pin. Roll the first piece of dough into a 13” circle and transfer to a 9” wide pie pan. The edges should hang a little over the edges of the pie dish.
- Fill with the cherry pie filling, and add the cold butter cubes all over the filling.
- Roll the second piece of dough into a 12” circle and use a pizza cutter or a knife to slice into ten 1 inch strips. Create a lattice crust over the top (see FAQ). Tuck in the excess dough at the edges.
- In a small bowl, beat the egg with the milk or the melted butter and brush over the lattice crust and edges of the pie. Sprinkle the top with the coarse sugar. Bake for 40 minutes or until the cherry filling is bubbly and the crust is golden.
Notes
- You can use a refrigerated crust if you would like to instead of a homemade crust.
- Frozen cherries can be used in replace of fresh, see my tips above.
- This can be frozen for later use, see my tips above.
- You do not have to lattice your top if you do not want to, see my tips above on an alternative.
- Let the pie cool slightly before slicing to allow the filling to set up.
Nutrition
Tornadough Alli is not a nutritionist or dietitian, and any nutritional information shared is an estimate. If calorie count and nutritional value is important to you, we recommend running the ingredients through whichever online nutritional calculator you prefer. Calories and values can vary depending on which brands were used.


Leave a Reply